This is a guide on how to install and deploy BlackFog’s macOS Agent via the Microsoft Intune endpoint management solution. This guide provides instructions based on Microsoft Intune process. Other MDM solutions may have a different process.
Step 1: Download Package
Step 2: Download Config
In Intune navigate to:
Devices > Manage Devices > Configuration > Policies
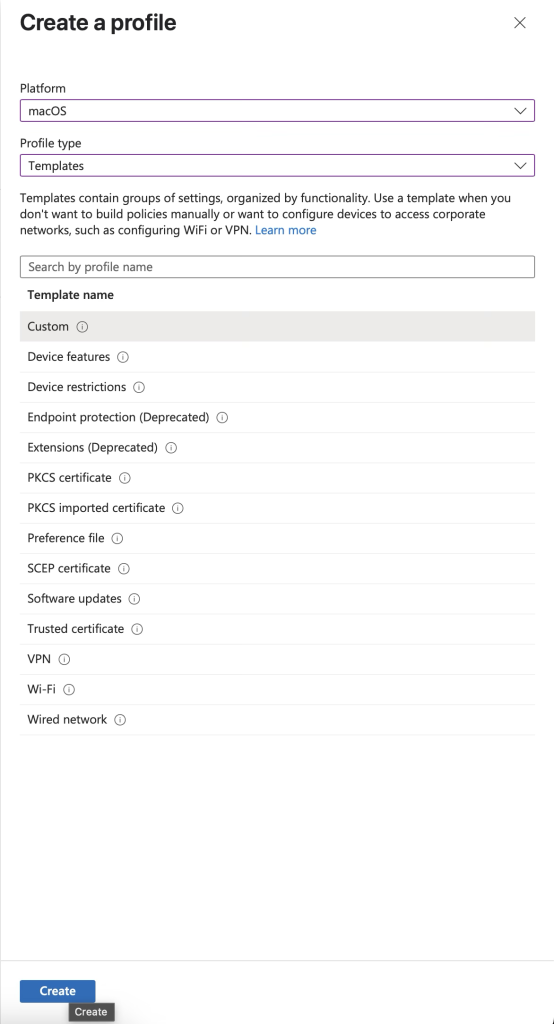
- Create a new policy
- Platform -> macOS
- Profile Type -> Templates -> Custom
- Click Create
- Add a name and click Next
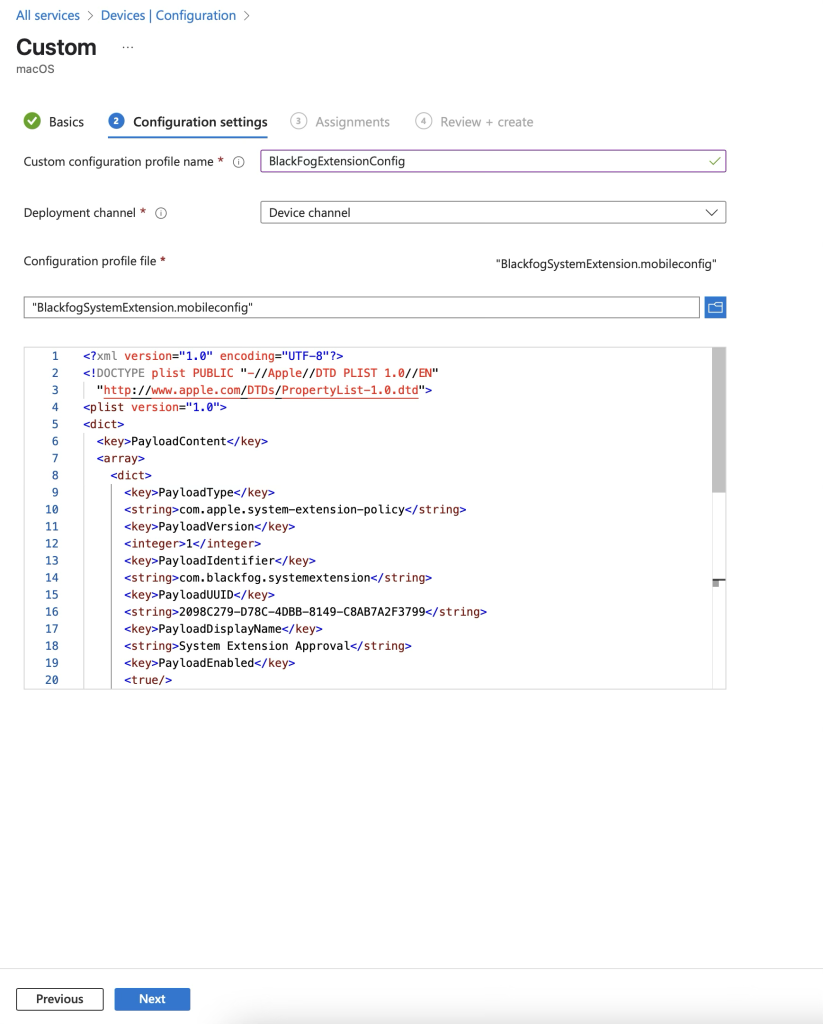
Next create a custom configuration:
- Add a profile name such as “BlackFogExtensionConfig”
- Select the mobileconfig file
- Click Next
- Assign Devices / groups
- Click Next
- Review & Create
Step 3: Add App
Now we can add the application to the Apps section
- Go to Apps > macOS > Create
- Select app type macOS app (PKG)
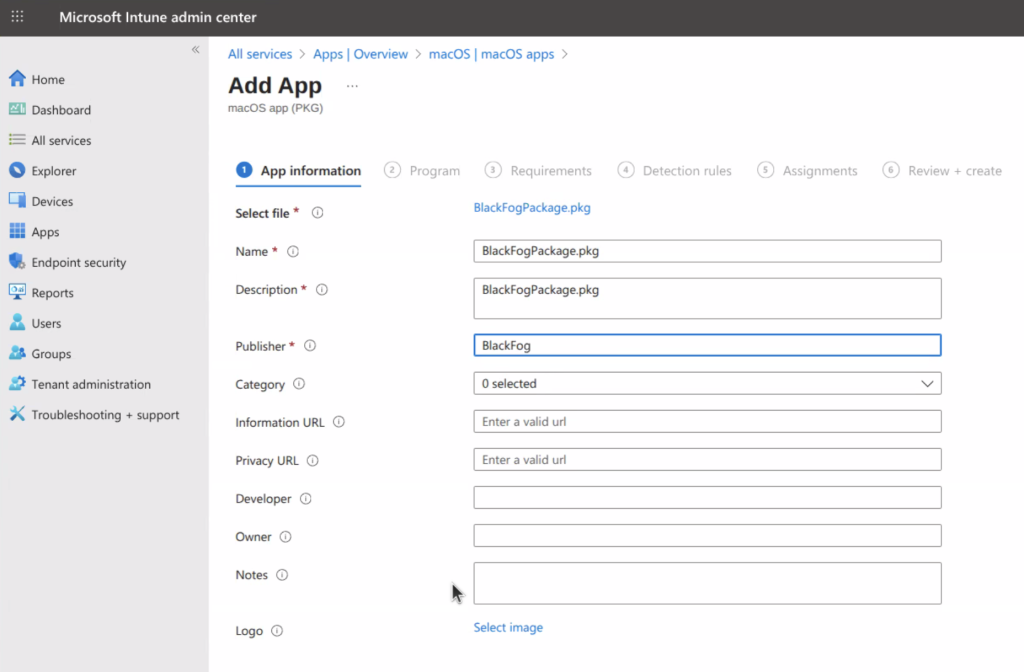
- Select the App package file which will be the BlackFogPackage.pkg file
- Add publisher name and click next
- For post install Script see Step 4 below
- Click Next
- Min OS -> macOS Ventura 13.0
- Click Next
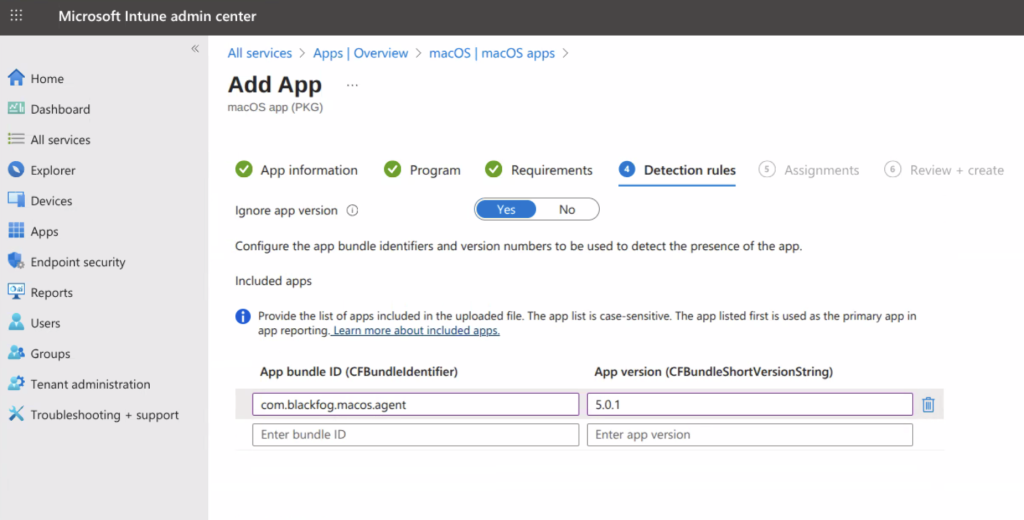
- App bundle ID -> com.blackfog.macos.agent
- App version -> 5.0.2
- Click Next
- Assign devices
- Click Next
- Review and click Create
Step 4: Post Install Script
To auto apply license key and auto start BlackFog a post install script is required. Add this to the post install script section when adding the BlackFog app. Note you will need to insert your license key where indicated.

